

How To Add 2 Images In Opencv In C++
Reading, displaying, and writing images are basic to image processing and figurer vision. Even when cropping, resizing, rotating, or applying different filters to process images, you'll need to beginning read in the images. So it'due south of import that y'all master these basic operations.
OpenCV, the largest estimator vision library in the globe has these three built-in functions, let's find out what exactly each one does:
-
imread()helps the states read an image -
imshow()displays an image in a window -
imwrite()writes an image into the file directory
- Reading an Image
- Displaying an Epitome
- Writing an Epitome
- Summary
We will employ the following paradigm to demonstrate all the functions here.

Starting time, go through this code instance. Information technology reads and displays the higher up image. Run into, how it contains all the three functions, we just mentioned. As y'all proceed further, nosotros will hash out every single function used in this implementation.
Python
# import the cv2 library import cv2 # The function cv2.imread() is used to read an image. img_grayscale = cv2.imread('test.jpg',0) # The function cv2.imshow() is used to brandish an image in a window. cv2.imshow('graycsale image',img_grayscale) # waitKey() waits for a central press to close the window and 0 specifies indefinite loop cv2.waitKey(0) # cv2.destroyAllWindows() merely destroys all the windows we created. cv2.destroyAllWindows() # The function cv2.imwrite() is used to write an image. cv2.imwrite('grayscale.jpg',img_grayscale) Download Code To easily follow along this tutorial, please download code past clicking on the button below. It's Complimentary!
C++
//Include Libraries #include<opencv2/opencv.hpp> #include<iostream> // Namespace nullifies the use of cv::function(); using namespace std; using namespace cv; // Read an prototype Mat img_grayscale = imread("examination.jpg", 0); // Display the prototype. imshow("grayscale image", img_grayscale); // Await for a keystroke. waitKey(0); // Destroys all the windows created destroyAllWindows(); // Write the image in the aforementioned directory imwrite("grayscale.jpg", img_grayscale); Allow'due south begin by importing the OpenCV library in Python and C++ (equally shown below).
Python:
# import the cv2 library import cv2 In C++, use #include (every bit shown beneath) to attain the aforementioned. Also specifying the namespaces for information technology lets you refer to role names directly. No demand to prepend them with the namespace (eastward.thousand. instead of cv::imread(), you can just directly use read()).
C++:
//Include Libraries #include<opencv2/opencv.hpp> #include<iostream> // Namespace nullifies the use of cv::function(); using namespace std; using namespace cv; Reading an Image
For reading an epitome, use the imread() function in OpenCV. Here'due south the syntax:
imread(filename, flags)
It takes two arguments:
- The beginning statement is the image proper noun, which requires a fully qualified pathname to the file.
- The second argument is an optional flag that lets you specify how the image should be represented. OpenCV offers several options for this flag, but those that are nigh common include:
-
cv2.IMREAD_UNCHANGEDor-ane -
cv2.IMREAD_GRAYSCALEor0 -
cv2.IMREAD_COLORor1
 – LearnOpenCV")
I've partnered exclusively with OpenCV.org to bring you official courses in AI, Computer Vision, and Deep Learning to take you on a structured path from first steps to mastery.
The default value for flags is 1, which will read in the image equally a Colored image. When you desire to read in an image in a particular format, just specify the advisable flag. To check out the unlike flag options, click here
It'due south besides important to note at this betoken that OpenCV reads color images in BGR format, whereas most other computer vision libraries employ the RGB aqueduct format order. Then, when using OpenCV with other toolkits, don't forget to swap the blue and cerise colour channels, every bit you switch from 1 library to another.
As shown in the code sections below, we will get-go read in the test prototype, using all three flag values described to a higher place.
Python
# Read an image img_color = cv2.imread('test.jpg',cv2.IMREAD_COLOR) img_grayscale = cv2.imread('test.jpg',cv2.IMREAD_GRAYSCALE) img_unchanged = cv2.imread('examination.jpg',cv2.IMREAD_UNCHANGED) C++
// Read an image Mat img_color = imread("test.jpg", IMREAD_COLOR); Mat img_grayscale = imread("test.jpg", IMREAD_GRAYSCALE); Mat img_unchanged = imread("exam.jpg", IMREAD_UNCHANGED); Or
Python
img_color = cv2.imread('test.jpg',1) img_grayscale = cv2.imread('test.jpg',0) img_unchanged = cv2.imread('exam.jpg',-1) C++
Mat img_color = imread("examination.jpg", 1); Mat img_grayscale = imread("test.jpg", 0); Mat img_unchanged = imread("exam.jpg", -1); Displaying an Image
In OpenCV, y'all display an image using the imshow() function. Hither's the syntax:
imshow(window_name, epitome)
This role also takes two arguments:
- The first argument is the window proper noun that volition be displayed on the window.
- The second argument is the epitome that you want to display.
To display multiple images at once, specify a new window name for every image you want to display.
The imshow() function is designed to be used along with the waitKey() and destroyAllWindows() / destroyWindow() functions.
The waitKey() function is a keyboard-binding office.
- It takes a single argument, which is the fourth dimension (in milliseconds), for which the window will be displayed.
- If the user presses any key within this time menstruum, the program continues.
- If 0 is passed, the program waits indefinitely for a keystroke.
- You tin can too set the function to detect specific keystrokes like the Q key or the ESC primal on the keyboard, thereby telling more explicitly which central shall trigger which behavior.
The function destroyAllWindows() destroys all the windows we created. If a specific window needs to be destroyed, requite that exact window name as the argument. Using destroyAllWindows() besides clears the window or image from the main memory of the organization.The code examples below show how the imshow() function is used to display the images you read in.
Python
#Displays image inside a window cv2.imshow('colour image',img_color) cv2.imshow('grayscale image',img_grayscale) cv2.imshow('unchanged paradigm',img_unchanged) # Waits for a keystroke cv2.waitKey(0) # Destroys all the windows created cv2.destroyAllwindows() C++
// Create a window. namedWindow( "color prototype", WINDOW_AUTOSIZE ); namedWindow( "grayscale epitome", WINDOW_AUTOSIZE ); namedWindow( "unchanged image", WINDOW_AUTOSIZE ); // Show the image within it. imshow( "color image", img_color ); imshow( "grayscale prototype", img_grayscale ); imshow( "unchanged image", img_unchanged ); // Wait for a keystroke. waitKey(0); // Destroys all the windows created destroyAllWindows(); Below is the GIF demonstrating the process of executing the code, visualizing the outputs, and closing the output window:

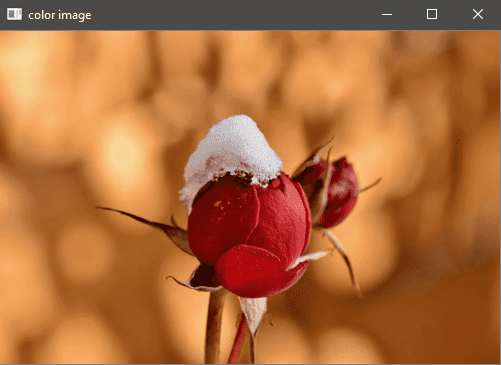
In the 3 output screens shown beneath, you tin can run across:
- The outset epitome is displayed in color
- The adjacent equally grayscale
- The third is again in colour, equally this was the original format of the paradigm (which was read using
cv2.IMREAD_UNCHANGED)
imshow() function.
imshow() office.
imshow() office.The below GIF shows execution of the code to read and brandish the image but without waitKey(). The window gets destroyed inside milliseconds, and no output is shown on the screen.

Writing an Image
Finally, let's hash out how to write/save an paradigm into the file directory, using the imwrite() office. Check out its syntax:
imwrite(filename, image).
- The start argument is the filename, which must include the filename extension (for example .png, .jpg etc). OpenCV uses this filename extension to specify the format of the file.
- The second argument is the epitome you desire to salvage. The function returns
Truthfulif the epitome is saved successfully.
Take a wait at the code beneath. See how uncomplicated it is to write images to deejay. But specify the filename with its proper extension (with any desired path prepended). Include the variable proper name that contains the image information, and you're done.
Python
cv2.imwrite('grayscale.jpg',img_grayscale) C++
imwrite("grayscale.jpg", img_grayscale); Summary
Here, you learned to use the:
-
imread(),imshow()andimwrite()functions to read, display, and write images -
waitKey()anddestroyAllWindows()functions, along with the display function to- close the image window on key press
- and articulate any open prototype window from the memory.
You lot have to experiment a lot when it comes to the waitkey() function, for it can be quite confusing. The more familiar you get with it, the better you can employ it. Do download the complete code to get some hands-on experience. Exercise well, as these are the basic building blocks that can really aid you learn and master the OpenCV library → OpenCV colab notebook.
Subscribe & Download Code
If y'all liked this article and would like to download code (C++ and Python) and case images used in this post, please click hither. Alternately, sign up to receive a free Computer Vision Resource Guide. In our newsletter, we share OpenCV tutorials and examples written in C++/Python, and Reckoner Vision and Machine Learning algorithms and news.

How To Add 2 Images In Opencv In C++,
Source: https://learnopencv.com/read-display-and-write-an-image-using-opencv/
Posted by: wardposs1950.blogspot.com
0 Response to "How To Add 2 Images In Opencv In C++"
Post a Comment